Posts Tagged ‘Laser Cutter’

Building Boxes and Enclosures with Laser Cut ABS

Wednesday, September 7th, 2011

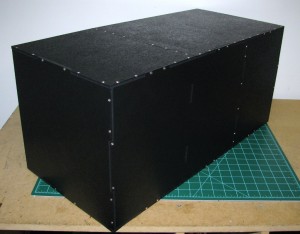
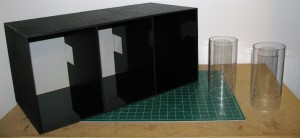
Above is a picture of a recent project I did for a client that wanted a custom enclosure for some experiments with mice. It's constructed from laser cut ABS sheets and held together with screws, but it doesn't use the now somewhat ubiquitous T-slot construction used in many laser cut enclosures.  Because ABS isn't extremely brittle like acrylic and doesn't have a grain or laminate layers like wood, you can simply screw it together without significantly effecting structural integrity if you do it right.

(Safety Note: This should go without saying, but if you're cutting ABS, properly handle the fumes! You need a properly sized carbon filter on your exhaust and you need to have adequate air flow. Additionally the parts should be left to outgas in a well ventilated area for at least 24 hours after cutting!)

I first used the method I'll be outlining here to construct a "dark box" add on for a piece of lab equipment.  It had to fit very snugly inside an existing box, not let light through, and not provide climbing holds for the mice under test.  I didn't want to end up gluing everything together (I'm glad I didn't, I had to modify the setup for an additional experiment later), and T-slot and bracket based attachment methods were not ideal.

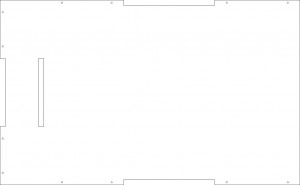
First off, in my enclosure design I've added tabs to ease alignment of all the connecting parts.  If done correctly, tabs will prevent you from assembling your enclosure incorrectly and allow you to quickly align edges of parts you're screwing together.  Tabs also allow you to insert screws into both of the parts you're joining perpendicularly, which a regular butt joint wouldn't allow you to do.  I use 1/2 inch #4 flat head sheet metal screws for 1/4" ABS.  I drill a 3/32" pilot hole is drilled into the parts that will be joined.  Pilot holes are a must, as you can drive a screw in to ABS with a little work, but you'll see stress lines and bulging, if not outright splitting of the plastic if you don't use an appropriately sized pilot hole. I place the pilot holes at design time and cut them into the part so I have a nice guide when it comes time to drill.  Here's an example of a part with tabs and pilot holes in place:

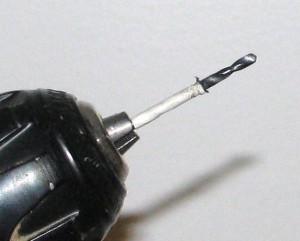
To make sure I hit the correct depth, I add some tape to the bit to let me know I've drilled far enough into the piece.

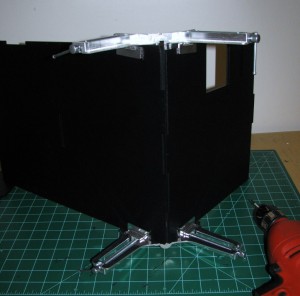
I use right angle clamps to hold the parts I'm joining in place while drilling.

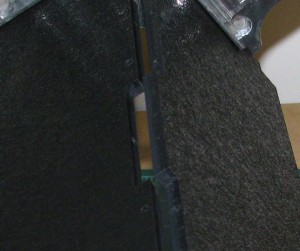
Here's a close up of the tabs and pilot holes after they've been drilled:

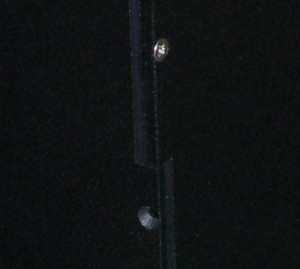
Next I countersink the holes and install the #4 screws:

You can prep and screw a side together relatively quickly with a little practice.  Once you've got a few sides on your enclosure, you can rely less on clamping parts together and simply hold down the panel you're installing with  one hand while drilling with the other (assuming you've added tabs to your parts so they align properly and stay in place).

Here's some pics of the finished product:

I've also used black oxide coated screws with this method to make the final enclosure look a little cleaner as well.  Overall I like the look of this method over T-slot construction for some projects since you don't have to oversize some parts to accommodate the tabs and screw holes and the joints seem a little sturdier as well.
Share

Laser Vector Grid Construction and Care

Sunday, March 13th, 2011

One thing many people might not know about laser cutters is that they require a lot of regular cleaning to keep them cutting effectively.   You've got to clean the optics on a weekly basis, clean out any little bits that might have fallen through the vector grid and wipe down the depth plunger and guide rods monthly, and oil the linear guides and clean the positioning strip every couple of months.  Who'd have thought selectively vaporizing stuff was so messy?

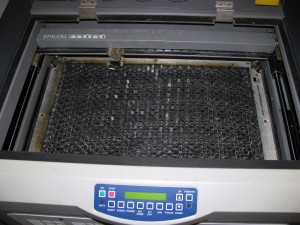
One other thing that I have to do about every six months is degrease the vector grid (yes, you have to regularly degrease some of your laser parts).  Before I get ahead of myself, I should probably explain what I mean when I say vector grid.  The vector grid is a metal comb that you set the material you're going to be cutting through on top of.  It's designed to support the material you're cutting and allow the laser to pass through it to prevent burning the back side of the material you're cutting.  It gets dirty because you're be blowing vaporized plastic (or resin if you're cutting wood) through it when you're cutting clean through material.

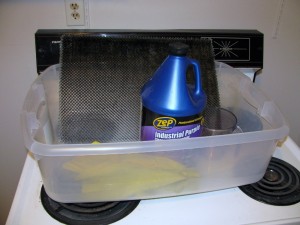
The manufacturer of my laser cutter, Epilog Laser, doesn't include instructions on how to clean the vector grid in their manuals, but they do have a nice guide online here.  I use about a 1:6 ratio of Zep purple degreaser to warm water compared to Epilog's suggested 1:4, and it seems to work fine for me.  I've got a small plastic container that's only a little bigger than my laser bed that I use to soak my vector grid.   It only takes about 12 cups of water to almost fully cover my vector grid in this container, so one gallon of Zep lasts me a very long time.  You'll notice that I've got a pair of rubber gloves in my box of supplies.  You definitely want to be wearing these and probably some goggles while working with the cleaning solution because Zep contains a number of bad things that can be absorbed through the skin (mainly Sodium Hydroxide AKA lye).

After dropping the vector grid in the diluted mixture it will start foaming all on it's own.  I agitate the mixture a bit and keep the grid soaking for a little less than 5 minutes.

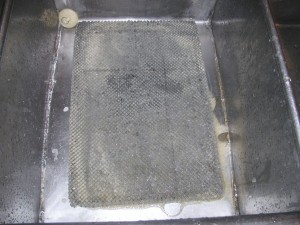
After soaking remove the grid and give it a good rinsing.  When done rinsing, shake it out a bit over the sink and let it air dry completely before using it again.  To give you an idea of how much stuff was pulled off the grid, the cleaning solution started off clear with a slightly purple tint and after soaking it's almost black:

And here's the grid after rinsing:

There's still some black residue on there (ABS from the car tag blanks I make) because it was really caked on and I didn't get a plastic pipe out and clean out those cells.  Be careful if you do choose to use pipe cleaners and scrub the vector grid, and just handling it in general, because it's made out of very thin aluminum an is damaged easily.

Building your own vector grid

Because certain materials get the vector grid gets very dirty, I wanted to make some spares.  I threw some 1/2" aluminum honeycomb in on one of my McMaster-Carr orders to see if it would be a usable substitute for the 1/4" cell spacing, 1/2" thick mat that came with the machine.  I was able to cut it easily with a pair of scissors and get one full bed sheet and one that was a little under an inch short from the 24"x24" sheet I ordered.

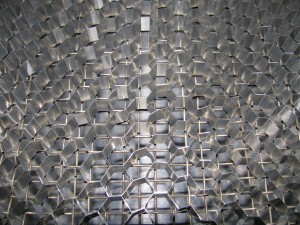
Unfortunately, it wasn't as rigid as the original vector grid and needed something to back it.  Next McMaster-Carr order, I added some heavy wire mesh to my order.  This stuff cut easily with a pair of side cutters and was easy to fit to the cutter bed.  I set the aluminum hex on top and it improved the rigidity:

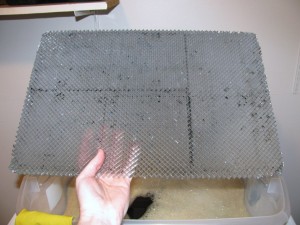
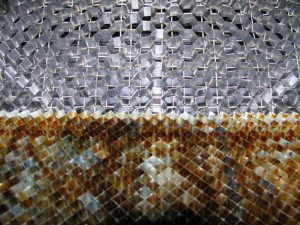
It's still not as rigid as the original vector grid but I think it'll work for what I'm cutting and all I'll likely have to do to fix this is switch out the wire mesh for some stiffer perforated metal in the future.  Here's a comparison between the original grid and the new one:

The new, wider spaced grid looks pretty level and, even though it was never a huge problem, I'm hoping the wider spacing will result in fewer burn marks on the back side of the material I'm cutting than the stock grid.

Update:

I've been using the new vector grid for a bit now and I love it!  Also, I talked to the local Epilog sales rep. and he said they ask about $395 for a replacement vector grid. I think I'll stick with my $35 spare for now.

Share

Quick Projects – Building Stock Storage Shelving

Sunday, November 21st, 2010

I don't often document the myriad of little projects I do, mainly because I don't see them as anything special.  These quick projects are generally me throwing something together because I need something immediately and I generally don't put a ton of thought into them, I just sit down and do them.  I figure I should probably get in the habit of documenting things so I'm starting to go back and take the time to post some of the smaller projects that I've done or am working on.  One such example is my stock storage shelves, which I'm covering in this post.

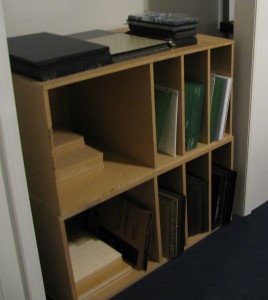
When I got a laser cutter I needed something to store all my laserable materials in so I hurriedly built some simple stock storage shelves.  They're cheap, easy to build and modify, and each can be constructed from a single 4'x8' sheet of material.  Thickness shouldn't be too important unless you plan on stacking them more than 2 units high, but I wouldn't plan on using anything less than 1/2" with the construction method I used on these.  For reference unit on top in the above  pictured is constructed from a sheet of 1/2" thick MDF and the one below it is constructed from a sheet of 5/8" MDF.

Here's a list of what you'll need to build one:

  • A single 4'x8' sheet of MDF at least 1/2" thick
  • 48-60 1-1/2" #8 wood screws (like these)
  • An electric drill/screwdriver
  • A small diameter drill bit and counter-sink (I used a combo bit and sink)
  • Some 90-degree corner clamps (like these)
  • Something to cut the MDF sheet (optional if you can get the place you get the MDF at to cut it down for you)
  • Optional - Something to back the shelf (I used a sheet of 1/4" MFD cut to fit the back)
  • Optional - Additional structural reinforcement (I didn't add any but you may want to add flat brackets or L-Brackets for you specific application)

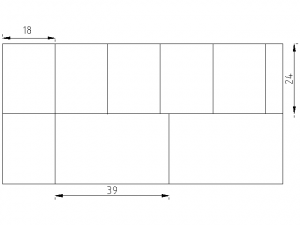
Here's a quick sketch of the cuts you'll need to make (units are inches):

All the dividers are 18"x24" (6 total) and the top/bottom are 39"x24".  Why 39" wide?  3.25 feet is close to the maximum width I could make them and still fit the pre-cut parts into my trunk easily.  Construction is pretty simple, just box things up using the corner clamps to hold everything in place and join each edge with 4-5 countersunk screws.  You can space the dividers out any way you want for your particular application.   You can do a number of things to make this sturdier overall as well, including adding bracketing or a thick backing, either by using pieces of one of the dividers at the corners or by cutting an additional piece of MDF to fit across the back.  I added a sheet of 1/4" MDF to the back of both of my shelves to prevent stuff from falling out the back and to make them look a bit nicer.

I'll probably need to build another one in the coming months and I'll try to take pictures of the construction this time!

Share