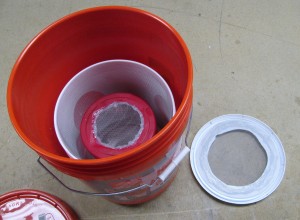
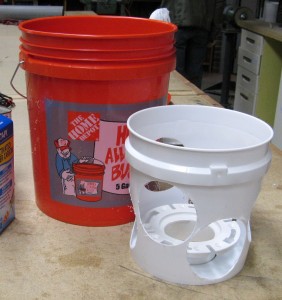
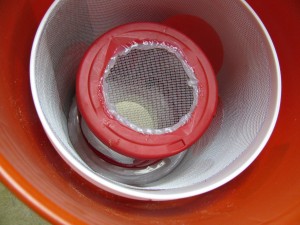
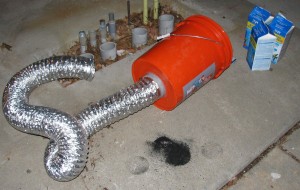
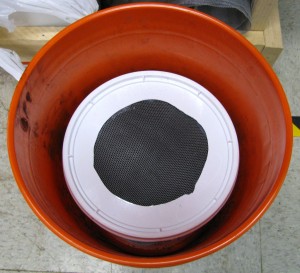
I'm going to be moving all my stuff to the new CCCKC HQ, Hammerspace by the end of March, and I've taken this opportunity to experiment with building a carbon filter for the laser cutter exhaust to cut down on VOCs and nasty smells generated by the machine. Being a cheapskate frugal, I decided to try to make a very cheap setup that's easy to build, seal up, and fill (and refill). Here's some more pics of my first prototype:
The setup consisted of a 5 gallon bucket with rubber seal to form the main enclosure, a 3 gallon bucket to hold the carbon, a plastic coffee can, some thin aluminum screen, 4" OD toilet anchors to act as ports, and a tube of silicone caulk to seal everything up. All components, except for the active carbon itself and the coffee can, can be found at a Home Depot for about $20.
Basically, I took the plastic coffee can, cut the sides out, and added some screen held in place with silicone to be my innermost support. For the 4" port on the bottom, I used a toilet anchor and cut 4" holes through the bottom of a 5 gallon bucket and a 3 gallon bucket and sealed everything up with silicone. A small ring of PVC that press fit the 4" OD toilet anchor was added for mechanical support (you can kinda see it in the pic where the 4" ducting is installed below).
The 3 gallon bucket was used to form a support cage which screen was attached to, much like the coffee can, but this time the holes were cut with the same 4" hole cutter that was used to make the holes for the 4" inlet (toilet anchor). The active carbon is poured in to the 3 gallon bucket and forms an envelope around the coffee can. Once filled, the 3 gallon bucket lid is installed. I probably took a little too much material out of the sides of the 3 gallon bucket, as it was a little difficult to get the lid on it because the sides kept collapsing a bit.
It took a little less that 3 quarts of active carbon to fill the void in the 3 gallon bucket (about 60 oz. by weight). I was surprised that very little of the active carbon actually made it through the screen (a little less than a tablespoon) while filling. After filling, I attached a 4" hose to the inlet and sucked some air through the filter (I would suggest you do this along with filling the filter outside) with a small dust collector motor. Airflow didn't seem particularly impeded by the filter so it should work well with the dust collection system in the shop.
In normal operation, air from the laser cutter would come in the coffee can where it would pass through 1.5"-2" or more of active carbon between the 3 gallon bucket interior and the coffee can exterior, then out the lid of the 5 gallon bucket. I'm eager to actually put this thing to the test here in the next 2-ish weeks and see if it actually works for filtering out the nasty gasses put off by the laser in operation.
