Archive for July, 2011

Kansas City Maker Faire Recap

Sunday, July 24th, 2011

I know it's been about a month since the event, but I thought I'd at least mention it a bit here.  First off, the 3D printer village went great and attracted the attention of lots of faire goers.  The TechZone guys were there showing off some of their new kits, we had a lot of MakerBot Cupcakes, Thing-o-Matics, an Ultimaker, an a few custom RepRaps there.  In addition to the 3D printer village, there were a few bots by the robot arena area, and one outside by the Power Wheels track brought by the Hackerspace in St. Louis, Arch Reactor.

I got the R3 prototype up and running for the event using a PC power supply and some RepRap V1.2 stepper drivers.  All the PCBs I ordered arrived about 2 weeks before the event, and with the exception of putting the parallel port on the opposite side of the break out board that I wanted it placed (it works fine, I just wasn't paying attention to the side it was mounted on when verifying the PCB), all the electronics worked first try.  I'll post some more info on this as I work on it and get the whole system running on 24V later on.  I've already nabbed the Z-axis off the R3 I demoed for another project, so it's currently non-functional again, but I've got the parts in for the second prototype that I'll be working on soon.  Hopefully I'll have more info and a full progress report in a few weeks.

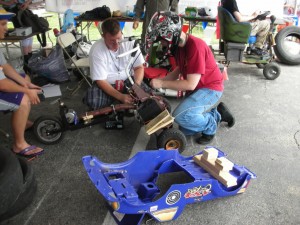
Finally, Power Wheels racing!  I helped CCCKC build two cars for the PPPRS that we hosted and got to drive in the race portion.  We had one car that was a very stripped down lawn tracker and one that was half snapper riding mower, half electric scooter:

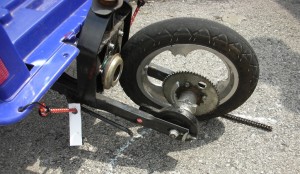
I particularly like the improvised petal, which is constructed from a couple 1"x4" wood blocks, a crude spring, a pair of shutter hinges, and some copper pipe clamps.  This one was reasonably fast, but got outclassed by the more experienced teams.  It might have done well in the endurance competition, had the rear wheel hub not been completely destroyed during the race while I was driving:

mfkc29

And here's a close up shot of the hub:

Both of our cars were in no shape to race at the end of the event, so I doubt we'll be going to Detroit to finish off the series.  Next year I think we'll be a lot better prepared by the time the series starts up again...


Share

Electronic Fireworks Ignition System

Monday, July 4th, 2011

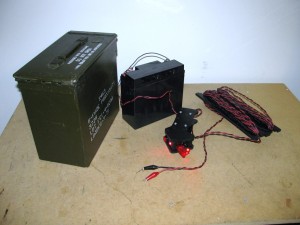
So here's another quick project I whipped up for the 4th of July, an electronic ignition system. Basically, it's just an aesthetically pleasing way to heat up some nichrome wire to ignite fireworks from a reasonably safe distance. I basically hit up my local Radio Shack for some cool looking switches, made a simple enclosure for them, and wired them up to apply power from a 12 Volt gel cell to a small section of nichrome wire after an arming toggle switch is engaged and a momentary switch is depressed.

Here's the BOM for this build:

Construction

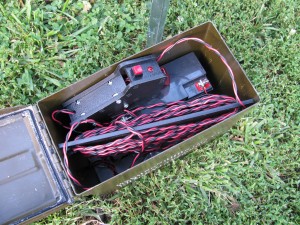
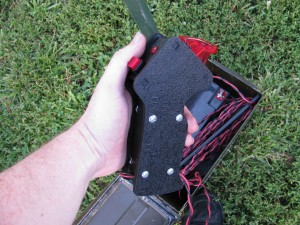
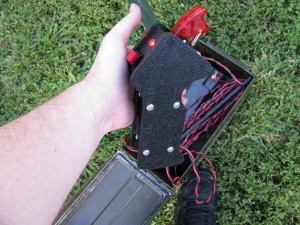
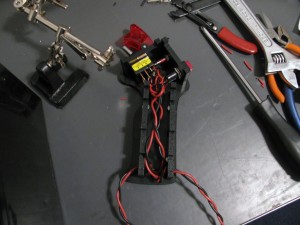
Spacing is pretty tight so you'll probably want to wire up everything before completely assembling. I twisted up my wire in a drill chuck for a previous project and you'll likely want to do the same unless you use speaker wire or some other multi-stranded wire.  It's hard to see in the picture below, but at the bottom of the handle  I also tied off the wire entering and exiting the enclosure. You'll want to do this to avoid damage to your connections in the enclosure should someone tug on the wires or trip over them (which happened several times during actual use for me).

I connected up the toggle switch to power and ground directly from the battery with about a 4 foot length of twisted pair wire. The LED's positive lead is connected to the accessory output of the toggle switch. This will make the LED illuminate when the trigger is ready to fire. One end of the momentary switch is connected to the accessory output as well and the other end is connected to the positive alligator clip with about a 20 foot section of twisted pair wire between them. The negative alligator clip is connected directly to ground.

All you have to do to ignite your fireworks is clip a small section of nichrome wire in between the alligator clips and set it across the wick of the firework you want to ignite and give it a short pulse of power to heat it up. I used a small section of recycled heater wire from a busted MakerBot hot end, which had a resistance around 6 Ohms. Using Ohm's law, this should pull about 2 Amps from the battery, which is well under the maximum current the momentary switch I got can handle.

I used a small scrap part to act as a spool for the log leads that go out to the fireworks which helped keep the wiring neat. I also shoved the whole thing in a spare ammo box for transport for a little added effect.  It works quite well, but I think it needs some sound effects and maybe a count down to make it a little more satisfying to use, but there's always next year!

WARNINGS!

Playing with fireworks is always dangerous and so is this project. Don't attempt to build this if you don't know what you're doing, because this stuff can catch fire all by itself, no explosives needed. Always set up the nichrome loop at the end of your alligator clips to fall away from your fireworks after igniting them. Also don't attempt to light things like sparklers with it. It'll work but you'll just end up destroying your nichrome. Thicker wicks, like the ones for artillery shells, seem to damage the nichrome as well.

Share