One thing many people might not know about laser cutters is that they require a lot of regular cleaning to keep them cutting effectively. You've got to clean the optics on a weekly basis, clean out any little bits that might have fallen through the vector grid and wipe down the depth plunger and guide rods monthly, and oil the linear guides and clean the positioning strip every couple of months. Who'd have thought selectively vaporizing stuff was so messy?
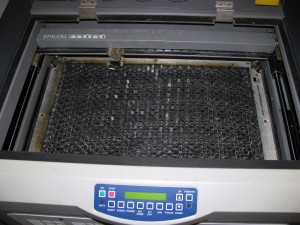
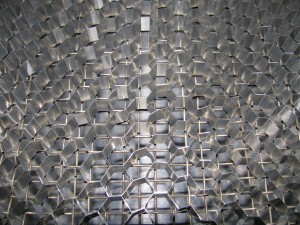
One other thing that I have to do about every six months is degrease the vector grid (yes, you have to regularly degrease some of your laser parts). Before I get ahead of myself, I should probably explain what I mean when I say vector grid. The vector grid is a metal comb that you set the material you're going to be cutting through on top of. It's designed to support the material you're cutting and allow the laser to pass through it to prevent burning the back side of the material you're cutting. It gets dirty because you're be blowing vaporized plastic (or resin if you're cutting wood) through it when you're cutting clean through material.
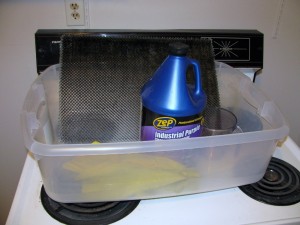
The manufacturer of my laser cutter, Epilog Laser, doesn't include instructions on how to clean the vector grid in their manuals, but they do have a nice guide online . I use about a 1:6 ratio of Zep purple degreaser to warm water compared to Epilog's suggested 1:4, and it seems to work fine for me. I've got a small plastic container that's only a little bigger than my laser bed that I use to soak my vector grid. It only takes about 12 cups of water to almost fully cover my vector grid in this container, so one gallon of Zep lasts me a very long time. You'll notice that I've got a pair of rubber gloves in my box of supplies. You definitely want to be wearing these and probably some goggles while working with the cleaning solution because Zep contains a number of bad things that can be absorbed through the skin (mainly Sodium Hydroxide AKA lye).
After dropping the vector grid in the diluted mixture it will start foaming all on it's own. I agitate the mixture a bit and keep the grid soaking for a little less than 5 minutes.
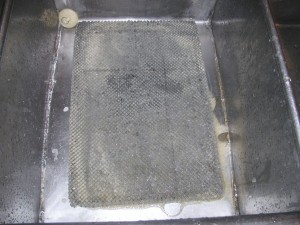
After soaking remove the grid and give it a good rinsing. When done rinsing, shake it out a bit over the sink and let it air dry completely before using it again. To give you an idea of how much stuff was pulled off the grid, the cleaning solution started off clear with a slightly purple tint and after soaking it's almost black:
And here's the grid after rinsing:
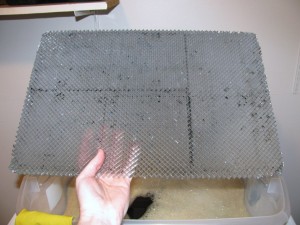
There's still some black residue on there (ABS from the car tag blanks I make) because it was really caked on and I didn't get a plastic pipe out and clean out those cells. Be careful if you do choose to use pipe cleaners and scrub the vector grid, and just handling it in general, because it's made out of very thin aluminum an is damaged easily.
Building your own vector grid
Because certain materials get the vector grid gets very dirty, I wanted to make some spares. I threw some 1/2" in on one of my McMaster-Carr orders to see if it would be a usable substitute for the 1/4" cell spacing, 1/2" thick mat that came with the machine. I was able to cut it easily with a pair of scissors and get one full bed sheet and one that was a little under an inch short from the 24"x24" sheet I ordered.
Unfortunately, it wasn't as rigid as the original vector grid and needed something to back it. Next McMaster-Carr order, I added some heavy to my order. This stuff cut easily with a pair of side cutters and was easy to fit to the cutter bed. I set the aluminum hex on top and it improved the rigidity:
It's still not as rigid as the original vector grid but I think it'll work for what I'm cutting and all I'll likely have to do to fix this is switch out the wire mesh for some stiffer perforated metal in the future. Here's a comparison between the original grid and the new one:
The new, wider spaced grid looks pretty level and, even though it was never a huge problem, I'm hoping the wider spacing will result in fewer burn marks on the back side of the material I'm cutting than the stock grid.
Update:
I've been using the new vector grid for a bit now and I love it! Also, I talked to the local Epilog sales rep. and he said they ask about $395 for a replacement vector grid. I think I'll stick with my $35 spare for now.
Tags: Laser Cutter

