When it comes to free and/or open source CAD/CAM tools, I have yet to run into any packages or tool chains that are particularly full featured, easy to use, and glitch free. Because of this, its a better strategy currently to learn the set of tools that are available to you, and how to work within their limitations. Today I'm going to talk about one such tool you might want to add to your CNC toolbox, FreeMILL from MecSoft.
Basically, FreeMILL can best be viewed as a nice script for taking a 3D model and creating a simple set of toolpaths for reproducing it on a standard 3-axis CNC mill. It has its limitations, and it's a little buggy, but it provides a very quick and easy way to go from a 3D model to a physical part. Plus it's free.
Get it here:
There's also a community site for it here:
First off I'll walk you through the process of generating toolpaths from a 3D model with FreeMILL. FreeMILL supports a few 3D formats, including STL, VRML, Rhino, and VisualMILL (another one of their products). I only used the STL support since it's what my source models are in and probably the most widely used format for the hobbyist user and almost all 3D packages support it.
If you're running Windows 7 or Vista, you'll want to run FreeMILL as admin (right click the lauch icon, select "Run as administrator"). You'll want to do this because the default output directory for the resulting G-code file will be the install directory, which FreeMILL won't have write access to by default. If it crashes randomly or the preview of your model looks weird you may have to revert to a basic Windows theme and/or disable hardware rendering. Switching to the Windows 7 Basic theme was enough to make it somewhat stable for me.
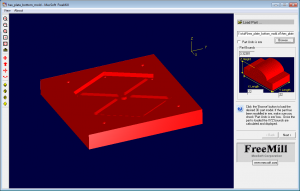
After launching FreeMILL, you'll follow a wizard step by step until you generate your final toolpaths. The first step is to load your 3D model. I'm using a model of a ceramic mold that someone at the space wanted fabbed. You'll get a nice preview of the part and the determined bounds of the part and you'll be given the option to specify that your part is specified in mm. I assume the default is inches, as this seems to be the standard for models specified in imperial units. If your part looks like it's about the right size, click next.
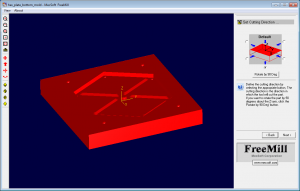
Now you will be asked to specify the cutting direction. This seems to simply be a way to specify the projection that will be cut (someone correct me if I'm wrong). If your model is already oriented correctly, just click next, otherwise use the radio buttons to orient it correctly.
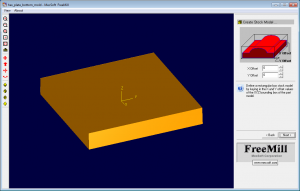
Next you'll select the offset of the stock. This is how much bigger the piece of material you'll be cutting is than the model on either side. Since this is an offset, if you have a particular piece you want to cut a model out of, you'll have to measure the piece, look at the reported model size and do some math to get the right offset. I simply left both offsets to zero since I was going to cut the final part out by hand.
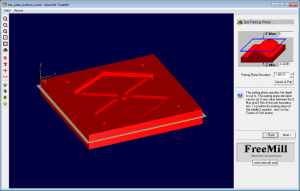
Now we set up the parting plane. Parting plane is a mold making term for the plane where the two halves of a mold meet up. In FreeMILL, this simply defines the lowest the Z axis will go when tracing the 3D model. Depending on what you want to do, you may want to simply set this plane to a depth that will get all the details you want to see in the final product as I've done here. I'll go into some detail on the games you can play with this setting to achieve various things later. A couple times running through the wizard I got some odd values on this page and the application immediately crashed when I tried to continue even thought the preview looked fine. Repeating the first couple steps seemed to fix this...
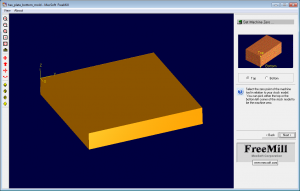
Next we set up our origin. There aren't a whole lot of options here. You'll likely want to select top so you can easily touch off on your stock with your mill (this puts Z=0 at the surface of your material).
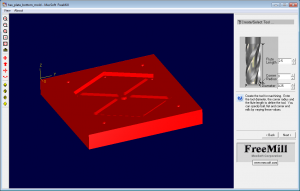
Next we specify our cutting tool. Again, this is pretty straight forward, just put in the parameters of the mill you will be using. I'm 1/4" flat endmill here but on the final part I used a 1/8" endmill with a 1 degree taper since I couldn't get all the details of the model fleshed out with the 1/4" endmill. You'll see this later in the preview.
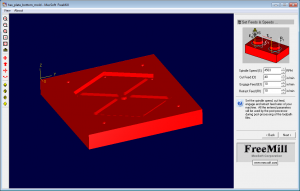
Next we set up the spindle and feed rates for the material you'll be cutting. A feed rate of 40 inches per minute is fairly conservative for the machine this will be running on since we're just going to be using housing insulation foam board.
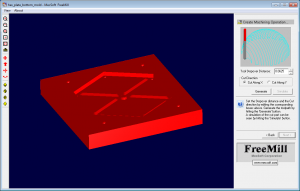
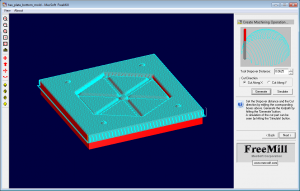
Now we get to select our stepover distance (the distance between passes) and generate our tool paths. Tool path generation seems pretty quick and the progress of the processor is updated in the preview window as individual passes are generated.
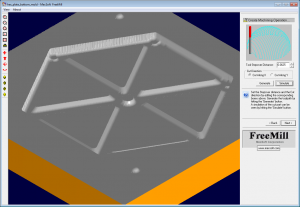
Here's what it'll look like after the paths have been generated. We can also simulate the toolpaths and see what the final product might look like. You can see here that not all the details of the model will be preserved with a 1/4" endmill based on the preview.
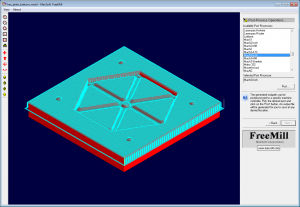
Next we select the post processor and save our final output. I'm using Mach3 (configured to use inches) to drive the CCCKCCNC, so I select that post processor.
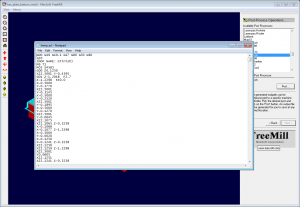
When you save, a temporary file containing the G-code for the generated toolpaths will be created and opened for you. Save this file wherever you want and you're done!
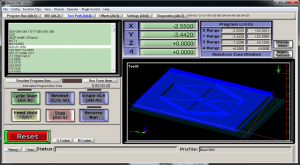
You can look at the generated toolpaths in Mach 3 if you're on Windows or with EMC2 on Linux. Here's what the generated toolpaths look like in Mach 3:
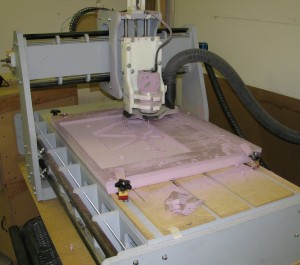
After regenerating toolpaths for an 1/8" endmill, I loaded the G-code on the CCCKCCNC machine and milled the mold without issue. You can see that this thing is actually pretty big (the outside edge of the mold is 22"). It's almost too big to clamp from both sides and not have the skirt run into anything.
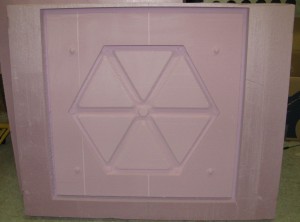
And here's the finished product:
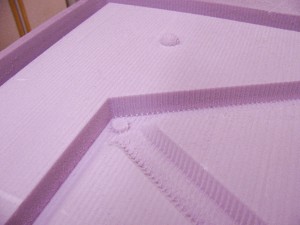
Here's some close up shots:
This entire part took about 4 hours to mill with a 1/8" endmill at 40 inches per minute feed rate and a 0.07 stepover distance.
What FreeMILL doesn't do and how to get around that
The simplicity of FreeMILL is nice, but it really lacks a lot of functionality. Here's some stuff that would be really nice to have but you can't really do:
- More bit options, only flat and corner radius mills are supported (ball mills are a special case which are supported, but not V-bits)
- Depth per pass and roughing passes can't be specified
- Only X or Y parallel finishing available
A lot of these shortcomings can be worked through by generating additional passes manually. For instance, you can't specify the maximum depth per pass, so if you've got a design that's relatively thick, the generated toolpaths will have your bit plunging all the way to the maximum Z depth of your part and then dragging through your material. This is a problem for a lot of mills and materials, but you can get around this by setting the parting plane to different Z depths manually and generating toolpaths for deeper and deeper cuts then feeding them to your machine the the correct order.
You can use the same principal to create roughing passes with larger mills then a final detailed path with a smaller mill and smaller stepover distance. You can create paths for X parallel finishing and then the Y parallel finishing on your final pass as well.
General Impressions
It should be no surprise that MecSoft seems to be releasing FreeMILL primarily to promote its other CAM tools. I do appreciate that they effectively put out a demo that, while being a little light on features, actually lets you generate usable G-code. As a free tool, it's annoying that it's buggy but it's still usable and worth the trouble. Now the catch is that you have to provide some information to download FreeMILL, and I gladly did. I'm not intimately familiar with their CAM offerings, but I wouldn't mind some additional information or a sales pitch and, as expected, I got an email promotion the day after I downloaded FreeMILL asking me to take a look at their CAM tools after trying out FreeMILL. The Monday after I played around with FreeMILL I actually got a call from their sales department asking if I was interested in ordering software after using the demo (yes, I do give out my Google Voice number).
Now even if I was interested in purchasing CAM packages, and I am, I don't think that the buggy, poorly maintained (at least since 2003), feature light demo that is FreeMILL would inspire confidence in MecSoft's offerings (especially from a hobbyist's perspective, since their tools are not cheap for that demographic). I understand that they probably don't want to or simply can't devote resources to maintaining a free utility, but they should probably put forth a little more effort if they're hoping that that same utility is going to help sell their software.
More CAM Stuff
I plan on posting some info and reviews of other CAM tools (and other useful software tools for CNC stuff), including and , but in the mean time, go check those two out if you're looking for other free CAM tools. I've successfully used dxf2gcode to generate toolpaths that I've run on machines for very simple 2.5D jobs. PyCAM seems like it needs a little work and didn't load the STLs I was using for the above project but it seems promising. I'll be keeping an eye on the project and playing with it in more depth in the future.
