Using Delrin Clips for Assemblies

October 4th, 2012

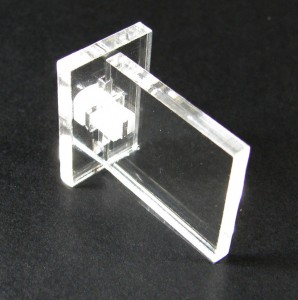
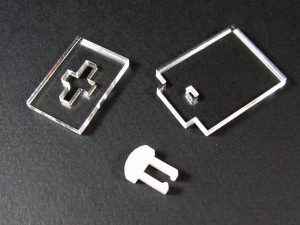
Delrin clip mechanism

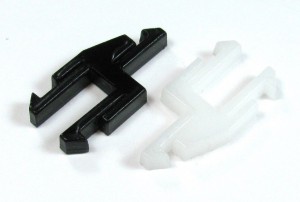
So to make it easier to assemble some of the enclosures I make I recently experimented with making some clips to hold the things together instead of using the ubiquitous nut and bolt based T-slot construction method used in tons of laser cut assemblies. Some have integrated clipping mechanisms directly into the acrylic of the parts of the assemblies, and I really like that method, but I don't really trust flexing acrylic to not become damaged easily through normal usage, so I opted to go with Delrin based clips.

Delrin clip mechanism

They seem to work fairly well and have a couple advantages over nut & bolt T-slots:

  • You don't have to hold the nut in place while joining the parts and placing the screw, which can be quite annoying and require the assistance of some tape in some cases.
  • You don't have to worry about over tightening the bolts and cracking the acrylic.
  • It's quicker and easier to assemble and disassemble parts, as you just have to press in or pull out the clips once all the parts are in place.

There are some disadvantages too. The clips have a little bit of play to them, so the connections aren't rock solid like they can be with nut and bolt T-slots. I wouldn't use clips on projects where mechanical rigidity is key, but they're pretty attractive options in a lot of other cases.

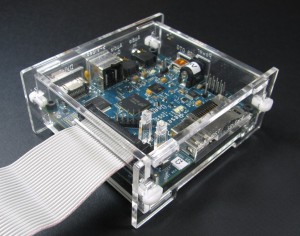
BeagleBoard Rev C Enclosure

Here's an example of a completed project using the clips. It's an enclosure for the BeagleBoard Rev C and you can grab the design files here if you want to take a look at the clip and slot designs or use them yourself.
Share

Projects Update 9/9/2012

September 9th, 2012

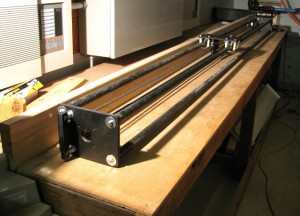
Gantry

It's been a while since my last post and things are starting to slow down a bit so I thought I'd make a quick post. First off, the automatics saw stop/pusher project that I've been working with a few other people at the space on is making a little progress. Above you'll see the initial prototype pusher hardware which we just got up and moving. It's a chain driven system with a 405 oz/in NEMA23 stepper driving the pusher. The electronics and software are coming along nicely as well and will hopefully be integrated and working soon.

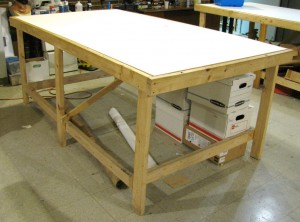
Why make an automated saw stop/pusher? Well tons of the stuff made at the space is basically a whole bunch of precisely cut 2x4s, like our big room tables:

table

There's 4 of these in the big room and a few more of similar construction in the shop area and we need to make more. Having a cut list and a device that automatically sets a stop and adjusts for the kerf of the saw when making successive cuts makes building these things super easy. It can also be used with other tools around the shop to help you do stuff like drill holes in a part at regular intervals. Hopefully it'll be a useful add-on to the newly constructed cut off bench in the shop.

Nanuk 920 case

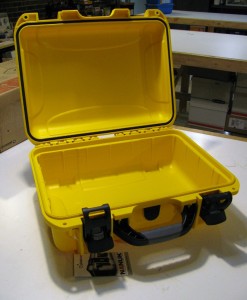
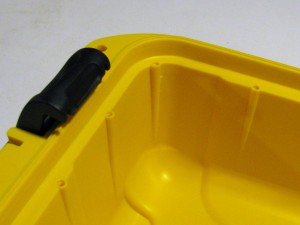
Next, a client of mine pointed me to these Nanuk cases for a potential cost down on a project. If you've worked with Pelican cases before these should look pretty familiar. They seem a little less sturdy than a similar sized Pelican, but not by much, and have the same nice feature set. One thing you may not know about Pelican cases is that Pelican sells an add on frame for most models that screws in to the case and allows a panel to be mounted to the inside to make an awesome project enclosure. These Nanuk cases can be found significantly cheaper and have lip and a set of holes on the inside of the rubber seal of the case that eliminate the need for a separate frame:

Nanuk close up

I'm definitely going to be using these for future projects!

Lastly, I'm going to be slowly rolling out new enclosures for the BeagleBoard, APC, and Raspberry Pi single board computers. If you've got any suggestions for other systems or projects that need enclosures or want variants on designs I already have, let me know!

Share

Using Delrin Clips for Mounting PCBs

July 30th, 2012

Board Clips

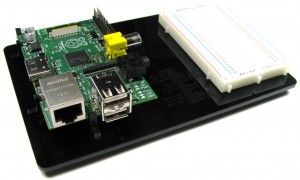
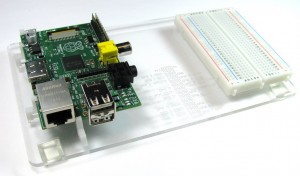
So one of the problems with the Raspberry Pi board is the lack of mounting options simply because it doesn't have any mounting holes. A few nice injection molded enclosures for the Pi and other boards out there use a simple clips to hold PCBs in place, eliminating the need for additional hardware. I figured there should be a good, easy to make solution out there for those of us that can't get injection molded parts on a whim so came up with some nice laser cut Delrin clips that can be used with typical laser cut mounts (see above pic). Here's a video of the clips in action on a prototype Raspberry Pi sled I'm working on:

As you can see, they're pretty easy to use with a properly designed mount plate. There's a couple advantages the clips have over the standard bolt, standoff, nut mounting method. First, you don't have to have all the additional hardware bits, just some Delrin stock. Second, they make assembly pretty easy with no juggling of bolts and standoffs on boards (if you've mounted a PCB before, you're probably had the moment you realize you didn't hold one of the bolts in place as you flip the board over to tighten everything down as miscellaneous hardware bits fly everywhere). Third, you can make the standoffs a specific height if you need to easily since you're not limited to the standard heights that are available.

You can grab the files for my Raspberry Pi sled reference design on my Thingiverse page if you want to try them out for yourself!

I've also got them in my store here!

Share

Highlighting Etching on Dark Laser Cut Parts

July 8th, 2012

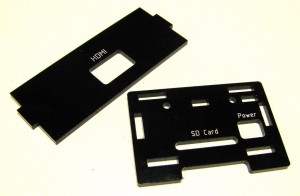
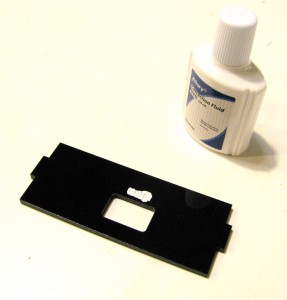
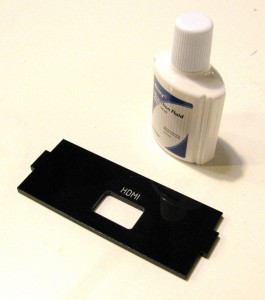
highlighted laser etchingWith a lot of people ordering Raspberry Pi enclosures from me, I decided to revisit trying to color etching on darker plastics. I found that cheap correction fluid works great! You'll want to make sure it's pretty thin so it wicks into the etching nicely. Add a nice thin layer over the etched areas of your parts and let it dry:

Adding color to dark laser etched parts

After letting it dry use a paper towel or a nice non-abrasive cloth and rub off the excess dried marking fluid to reveal the crisp text and graphics underneath:

Share

Epilog Laser Modules

June 10th, 2012

Laser module

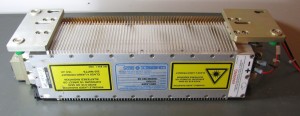
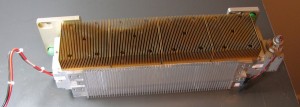
A couple months ago I had to replace the laser tube/driver on my 35W Epilog Mini-18.  It had slowly been losing cutting power for a few weeks before I had to get it replaced because I simply couldn't limp it along any more. I snapped a couple pics of the laser module before sending it back to Epilog to swap it out for a fresh one:

The entire module is housed in a big aluminum block and sits under 4 fans on the cutter for cooling.

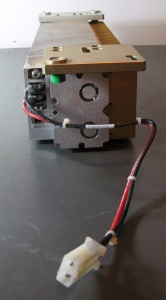
The whole thing appears to be powered off the main 48v power supply and it connects to the motherboard via a standard Cat-5 patch cable.

Laser module

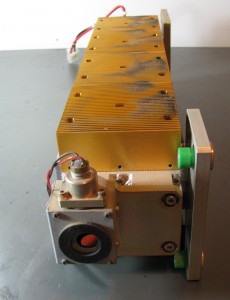
On the opposite end you can see the laser pointer module, used to adjust the optics and help you position the laser home position. Overall, these modules seem pretty well designed and pretty convenient if you're building a laser cutter. I'd love to be able to find laser module setups similar to this (air cooled, metal reflector tube, integrated visible laser pointer, integrated driver electronics) for a DIY laser cutter!

Share