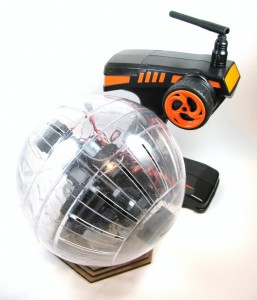
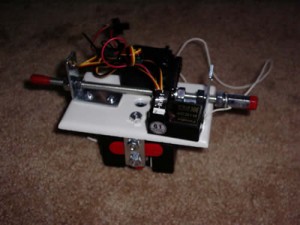
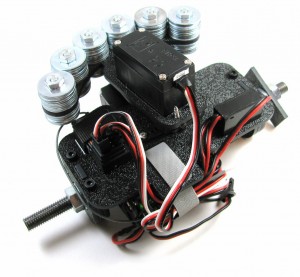
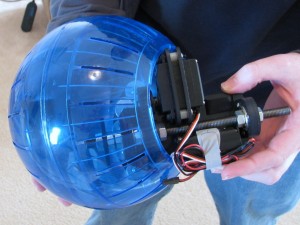
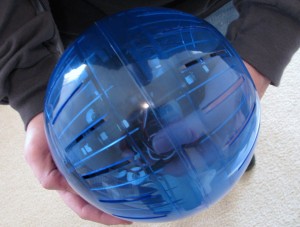
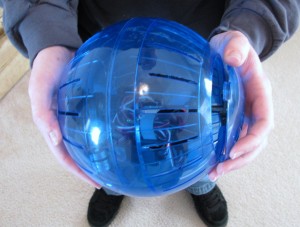
I recently revisited a project I threw together about 2 years ago, the remote control hamster ball! I made my original prototype out of a light switch cover, some L-brackets, 1/4" threaded rod and some spare RC stuff. It wasn't the prettiest project, and it didn't work great, but it did work:
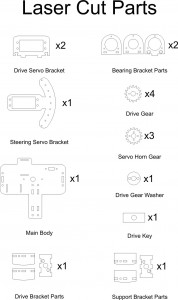
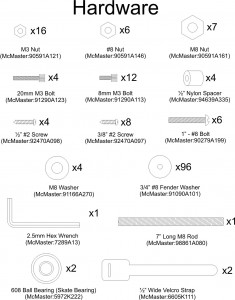
Fast forward a couple years an now I've got my handy laser cutter, some more cheap RC gear, and a bit more free time. My new design features nice durable laser cut ABS parts, is considerably easier to build, and goes in and out of the hamster ball fully assembled (it's a tight fit, but the original design had two parts that had to be assembled in the ball). I've posted up my design files for the new ball on Thingiverse . A list of hardware you'll need and a cheat sheet for the parts is included with the design, but here they are if you need a reminder:
I get my skate bearings from a local skate shop for a lot less than McMaster-Carr, so you might want to price skate bearings before ordering.
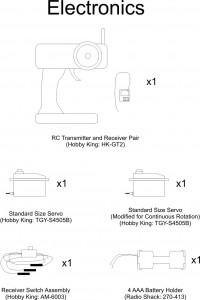
The only tricky thing to get in terms of electronics is a continuous rotation servo, and I suggest you just get a cheap standard servo an modify it yourself for continuous rotation. You can of course buy a stock continuous rotation servo rather than modify your own, but they're a lot less common than your standard RC servo and can be a bit slower based on some of the cheaper ones I tested (specifically the GWS35 STD). If you need some pointers on converting the specific servo used here over to continuous rotation, see my previous blog post. There are also plenty of good out there on the subject as well.
Now to to build this thing!
Assembly Instructions
Step 1: Assemble and install the mounting brackets in the hamster ball.
| Part | Qty |
|---|---|
| 7" Hamster Ball | 1 |
| Drive Bracket Parts | 1 |
| Support Bracket Parts | 1 |
| 8mm M3 bolt | 4 |
| M3 Nut | 4 |
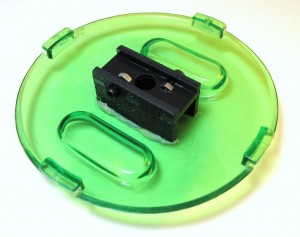
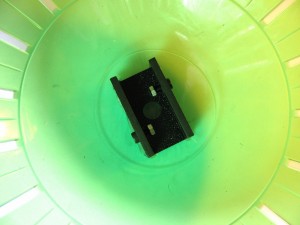
Make sure you pay attention to which side you install the brackets! One bracket couples the main assembly to the ball and should be installed in the ball itself. The other side supports the main assembly bit isn't driven and should be installed on the lid. You should be able to operate the ball if you switch this around, but it will be harder to assemble and harder to keep the lid from popping off during operation.
You'll need to glue the brackets in place and try and get them fairly centered on both the lid and the opposite side of the ball. I used special plastic epoxy to bond my brackets to the ball, but whatever you use, make sure it makes a strong bond between acrylic and ABS. Some epoxies don't bond to acrylic well and might not work.
Step 2: Install the drive servo brackets.
| Part | Qty |
|---|---|
| Drive Servo Bracket | 2 |
| Continuous Rotation Servo | 1 |
| 1/4" Nylon Spacer | 4 |
| 20mm M3 bolt | 4 |
| M3 Nut | 4 |
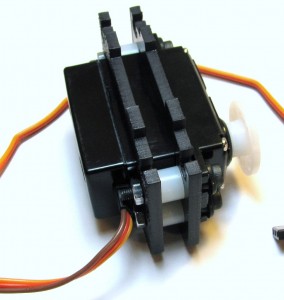
You'll want the rubber inserts for the servo installed. Take care to not pinch your servo wires when sliding the brackets on. Also, make sure the orientation of the servo matches the above picture.
Step 3: Assemble and install the drive servo gear.
| Part | Qty |
|---|---|
| Servo Horn Gear | 3 |
| 1/2" #2 Screw | 2 |
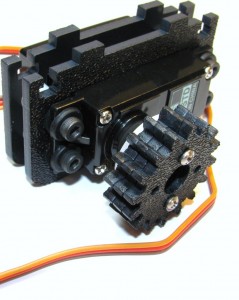
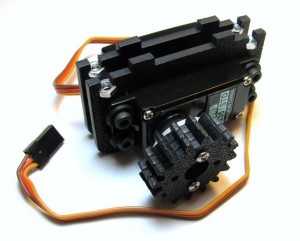
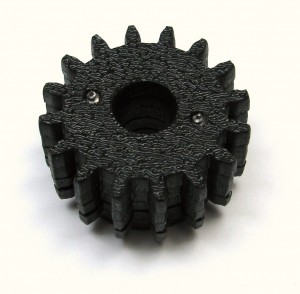
The drive servo gear consists of 3 layers of 1/8" ABS sandwiched together and screwed down to your drive servo horn. There are 2 sets of holes on all the drive servo gear parts, differentiating them from the drive shaft gear parts. These two sets of holes have slightly different spacing for use with different servo horns and you should only use one set of these holes to attach your servo drive gear parts.
Step 4: Place nuts and attach the drive servo to the main body.
| Part | Qty |
|---|---|
| 8mm M3 Bolt | 4 |
| M3 Nut | 4 |
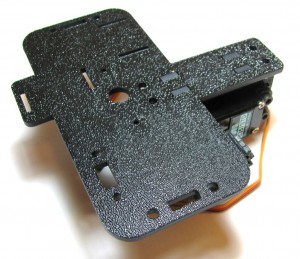
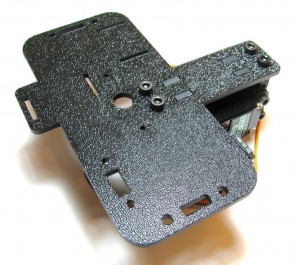
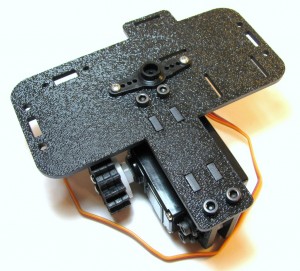
Place the drive servo assembly on a flat surface and install the M3 nuts. Next, carefully place the main body as shown and install the 8mm M3 bolts (the shortest M3 bolts) and tighten everything down.
Step 5: Attach steering servo horn to the main body.
| Part | Qty |
|---|---|
| 3/8" #2 Screws | 2 |
Attach one of the servo horns provided with the servo to the main body with two 3/8" #2 screws.
Step 6: Attach the steering servo to the steering servo bracket.
| Part | Qty |
|---|---|
| Steering Servo Bracket | 1 |
| Standard Servo | 1 |
| Servo Mounting Screws (hardware that comes with the servo) | 4 |
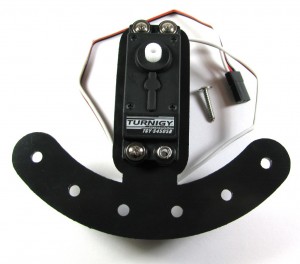
Use the mounting hardware that came with the servo to attach the steering servo to the steering servo bracket. Again, you' ll want the rubber inserts installed as well as the metal eyelets.
Step 7: Attach the weights.
| Part | Qty |
|---|---|
| 1" #8 Bolts | 6 |
| 3/4" Fender Washers | 96 |
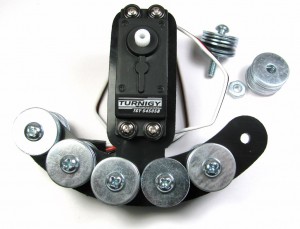
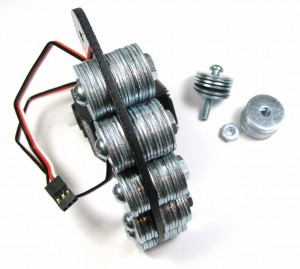
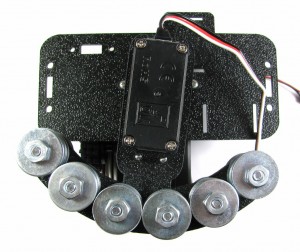
Now we'll attach stacks of washers to the weight plate. Shifting the weight of these washers around will allow the ball to move and be steered in a particular direction. Stack 6 washers on the side that will face the main assembly and 10 on the opposite side as shown for all 6 stacks.
Step 8: Center the steering servo and attach it to the main body.
The steering servo needs to be centered before attaching it to the main body. You can do this one of two ways. The first way to do this would be to attach the servo to a powered RC setup and let the servo find center automatically. Just plug in the servo and power up your receiver and transmitter and it should find center if you're not touching the controls.
The second way is to find it mechanically by installing a horn on your servo and moving it gently until it stops, indicating you've hit the end of travel in that direction. Note where the end of travel is then turn the horn gently in the opposite direction until it stops and note that location as well. Now move the horn until you're exactly half way between the two end of travel points and your servo should be centered.
You don't have to be too exact here, as you're transmitter should allow you to tweak the steering a bit. Once your servo is centered attach it to the horn you already installed on the main body with the horn screw supplied with your servo.
Step 9: Assemble the bearing brackets.
| Part | Qty |
|---|---|
| Bearing Bracket Parts | 2 |
| 3/8" #2 Bolts | 6 |
| M3 Nuts | 4 |
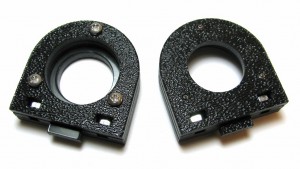
The main thing to remember here is that the part with the tab at the bottom goes in the center of your 3-layer bearing bracket sandwich. That, and remember to put your M3 nuts in between the layers as you're assembling them so you'll be able to attach them to the main body later.
Step 10: Assemble the drive shaft gear.
| Part | Qty |
|---|---|
| Drive Gear | 4 |
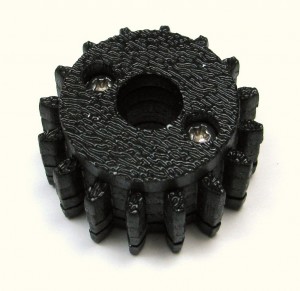
| 1/2" #2 Screw | 2 |
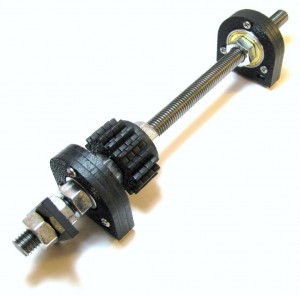
Using the 1/2" #2 screws, screw all 4 layers of the drive gear together. Here we see the completed drive gear with drive gear washer in place after the drive gear has been assembled:
Step 11: Assemble the drive shaft "kabob".
| Part | Qty |
|---|---|
| Drive Key | 1 |
| Completed Drive Gear | 1 |
| Completed Bearing Brackets | 2 |
| Drive Gear Washer | 1 |
| 7" M8 Rod | 1 |
| M8 Nuts | 7 |
| M8 Washers | 4 |
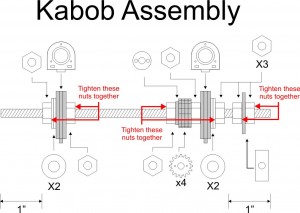
Next we take the assembled bearing brackets and drive gear and make the drive shaft kabob. Insert the skate bearings into the brackets and use the above diagram (not scale) and pictures as guide for the ordering of components. You'll want the open side of the brackets facing toward the center of the assembly. Leave about an inch of space on both sides of the bearings. You may want to try and use the main body assembly as a reference for the placement of the bearing brackets on the kabob as well as the drive bracket in the ball for the placement of the drive key on the kabob. Once all the parts are installed in the correct order with about the right spacing, tighten the pairs of nuts shown in the above diagram together with a pair of wrenches (hold one of the nuts in place and tighten the other, just like locking a pair of ). This will lock each bearing and the drive key in place on the drive shaft.
Step 12: Install the drive shaft.
| Part | Qty |
|---|---|
| 8mm M3 Bolts | 4 |
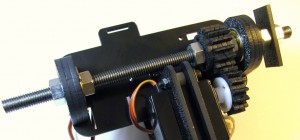
If everything's spaced correctly, you should be able to attach the drive shaft kabob to the main body without any problems. If the bearing brackets don't line up to the slots for them on the main body, you may have to make some minor adjustments to the kabob, retighten everything and try again.
Step 13: Assemble the battery wiring harness.
| Part | Qty |
|---|---|
| 4-AAA Battery Holder | 1 |
| RC Receiver Battery Switch Assembly | 1 |
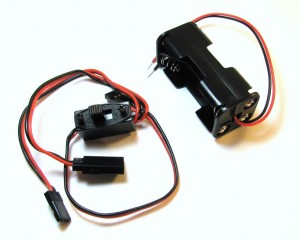
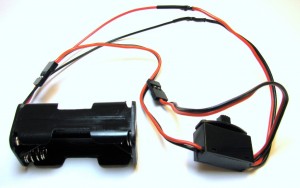
Next you'll want to prepare the wiring harness. Do this by simply splicing in your standard 4 AAA battery holder where the normal RC 4 cell battery back would plug in (the shielded connection not like the other 2 on the switch assembly).
Step 14: Install the batteries and power switch.
| Part | Qty |
|---|---|
| Velcro Strap | 1 |
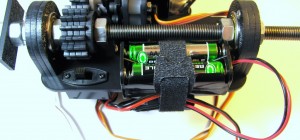
Use the hardware provided with the switch to mount it on the main body, add batteries, and use a Velcro strap to secure them to the main body as shown. Make sure you run the strap through both the slits on the main body provided for this. You'll probably have to trim a little of the strap off when you're done as well.
Step 15: Attach the receiver and clean up the wiring.
| Part | Qty |
|---|---|
| Velcro Strap | 1 |
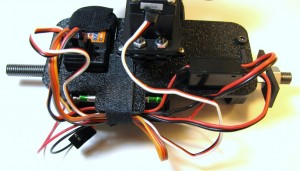
Next attach the receiver in a similar fashion. Plug the steering servo into port 1, the driver servo into port 2, and plug in power as indicated on the receiver. Clean up the wiring a bit by folding the excess lengths of wire under the Velcro strap holding the batteries in place.
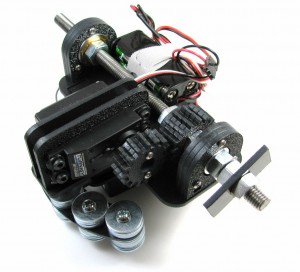
Here's what everything should look like when you're done:
Operating Instructions
Now that everything is assembled it's time to give this thing a test drive! Here's how to get everything in the ball and rolling.
Step 1: With the receiver powered off, insert the assembly into the ball.
Having the receiver turned off allows you to maneuver the steering servo around by hand, allowing you to more easily get the assembly in the ball. Make sure the drive coupler goes in first! I like to position the steering assembly so that it goes in first and the drive servo second. Try not to force anything, it'll fit without having to stretch the opening of the hamster ball.
Step 2: Power up your transmitter and turn the power on on the main assembly.
Now that the assembly is inside the ball you can turn on power after powering up your receiver. Be prepared for the steering servo to swing to center and the drive servo to start turning slightly if you don't have the trim for the throttle adjusted.
Step 3: Close up the ball and drive!
Now all that's left to do is put the cover on and drive. I've found that some ball covers don't secure all that well (or the ball get's distorted a bit when you run into something at a reasonable speed, popping the cover off), so if the cover pops off during operation you might need to add a strip of scotch tape or two across the cover to keep it secured while driving.
Here's some video of the mechanics:
And here's some driving videos:
When you're done, just open the cover and switch off the power to the ball and power off your receiver.
If you want to pick up the laser cut parts or hardware for this project from me (or a fully assembled ball), check out my !
Build Notes
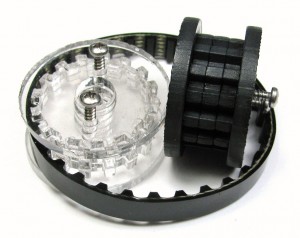
The design posted here is about the 3rd minor revision of the design. The first revision and had a belt driven design using a small 0.2" pitch belt and had the drive servo mounted up at an odd angle. The only part that got built from the first revision is the servo horn attachment for the 0.2" belts, which I might reuse later:
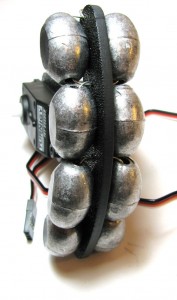
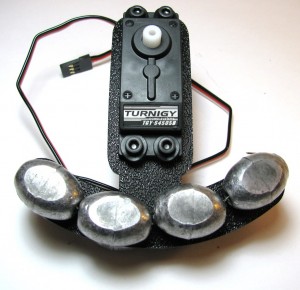
Revision 2 is pretty close to the design I have now, but it didn't have captive nuts for the bearing brackets. It also used flattened out 8 1oz. lead egg weights wired together with solid 22 gauge wire as the steering weight. The washer design's a bit bigger, but a lot easier to assemble and actually weighs more and allows for some tweaking of the design. Here's some pics of the second revision weight:
I'll probably stick with the lead free method in the future.
Also, you may have noticed the GWS S35/STD servo in a couple pics. This servo is a relatively inexpensive off the shelf continuous rotation servo you can pick up so you don't have to modify a servo manually to get continuous rotation. This servo has the torque to drive the hamster ball, but is just not nearly as fast (and thus not near as fun) as the modified TGY-S4505B servo I ended up using as the drive servo.
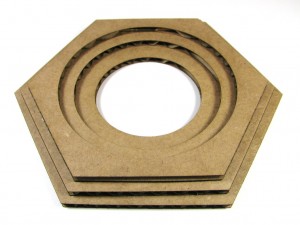
I also built some handy stands to set the balls in when not in use out of a couple pieces of cardboard:
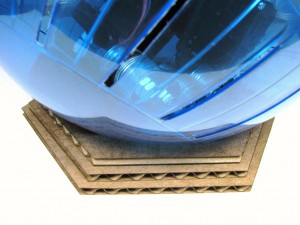 They're simply glued together with regular old Elmer's glue and keep the balls from rolling around (and off the workbench) when you do don't want them to.
