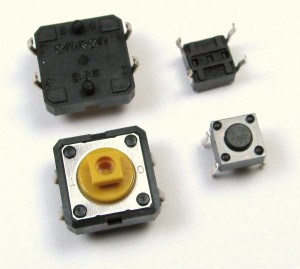
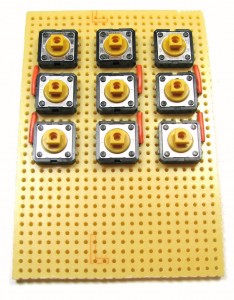
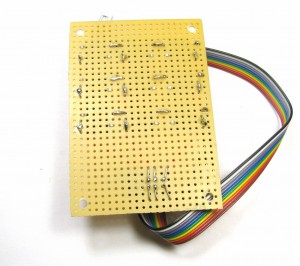
I thought I'd share the method for constructing arrays of push buttons using common 4-pin tactile switches that I came up with while building some keypads for testing an upcoming project. All you need is a little perf board, some solid core 22-gauge-ish wire, and a handful of 4-pin tactile switches. The specific switches I'm using here are , but there are plenty of similar switches out there (check out the huge selection at and ).
First off, these 4-pin switches generally have two pairs of pins that are connected to each other internally. The switches I'm using have pins 1 and 2 and 3 and 4 connected internally. When the button is pressed, the two sets of pins are shorted. We can take advantage of the internal connections of these buttons to easily create the interconnected rows or columns of our button array.
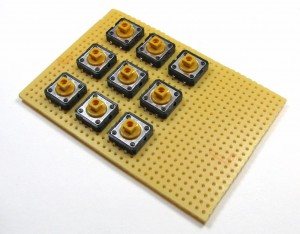
Start off by laying out your array on your perf board and cutting it down to size. I've left exactly one row of perf holes between each button. You can get away with placing them closer, but do not place them further apart, as we'll be bending the pins of the buttons to form electrical connections between buttons on the back side of the perf board. It doesn't matter what orientation you place the buttons with, as long as you're consistent.
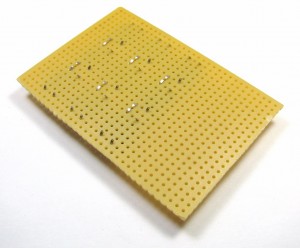
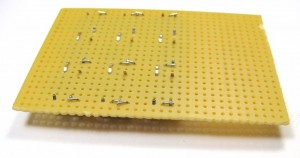
Next, flip the board over and bend the neighboring pins you want to connect together. You'll want to form a nice line of buttons that are all connected together on one side as shown. These connections form a row (or column, depending on the orientation) for your array.
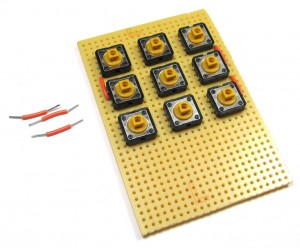
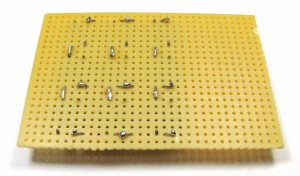
Next we'll need to form the columns of our array. You'll want to connect the side of the switches that you didn't bend together in the previous step together in columns perpendicular to the connections you just made. I do this with 22-guage solid core wire by first sizing a single jumper needed and pre-cut all 6 that I'd need to place to save time. I placed each wire jumper and bent the protruding ends in opposite directions so that each would stay in place until I soldered them down.
After all the wire jumpers are in place and the correct pins are in place, inspect your work and make sure everything looks good and that no columns or rows have been accidentally connected. If everything checks out, solder up all the connections.
Now the array is actually complete, using only 6 wires. Now all that's left to do is wire the row/columns of the array to whatever circuit you happen to be using with them and add some finishing touches.
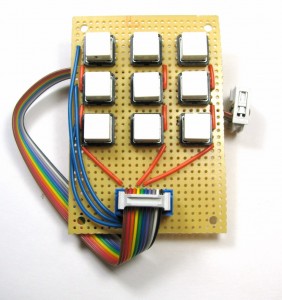
I added a 10-pin header to the board for connecting to some other hardware with some 10-pin ribbon cables I've got around, added some holes for mounting the keypad (and probably its cover plate), and added cap hardware. Hopefully I'll be posting details on the project these keypads will be used in in a couple weeks...
